Telgoo5 allows you to Setup or Create Sprint Plans, Topups and linked topups for all your lifeline/prepaid or postpaid subscribers.
To Setup a Sprint Plan, follow the following steps:
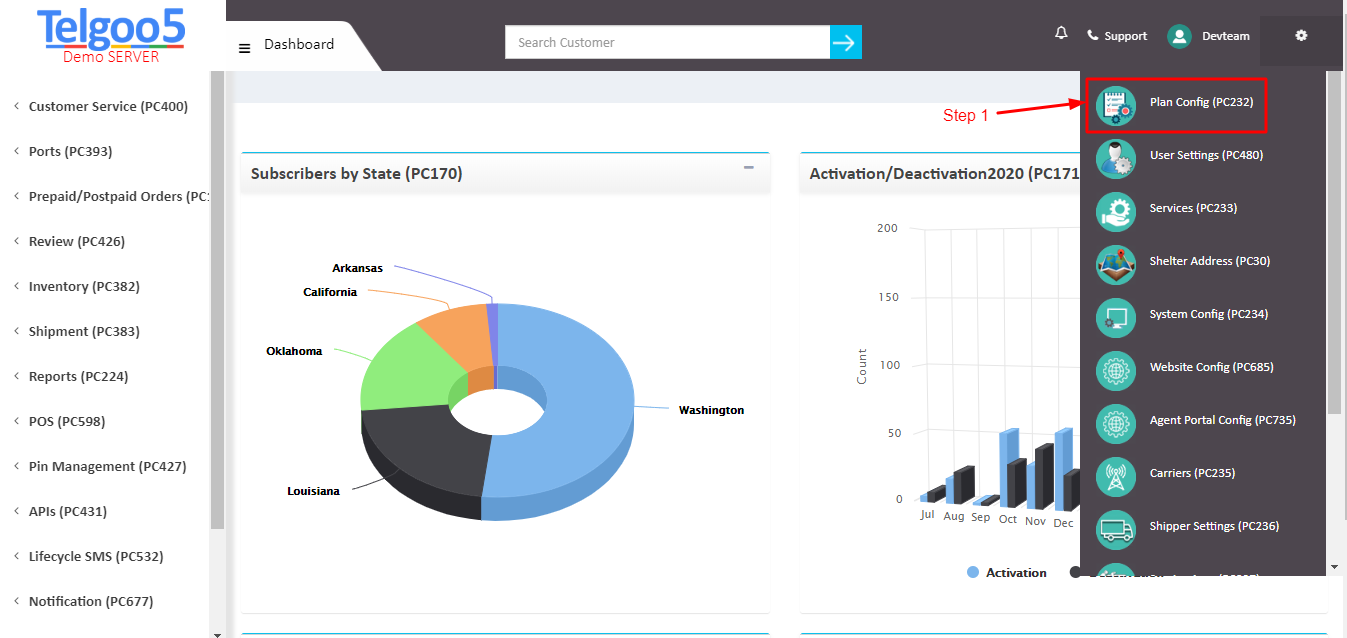
Step 1. : Go to Plan Configuration (PC 232) from the settings menu as shown in the Image below.
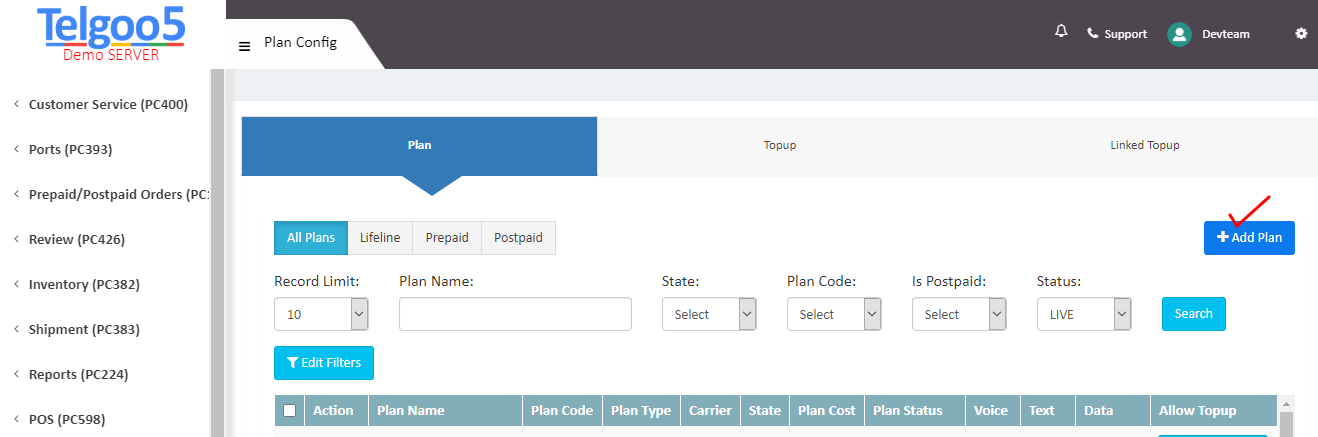
Step 2. : There would be three categories available on this page. 1. Plan 2. Topups and 3. Linked Topups. To setup the sprint Plans, click on plans.

What is the difference between Plans, Topups and Linked Topups?
- Plans: Plans are the master plans assigned to the subscriber at the time of account activation. An active customer would always be associated with a master plan so as to perform the activities like Renew plan, Change Plan etc.
- Topups: Top up is the form of recharge in which there is no any validity. It is applied only on the already existing master plan.
- Linked Topups: The linked topups is the additional amount over regular plan that subscribers can avail. These are linked with the master plans. For e.g.: Get 500MB data extra with 1 Month Standard Plan. The extra 500MB can be setup under the Linked top-ups.
Step 3. : Select Plans and click on [+Add Plan] button to add a new sprint plan.
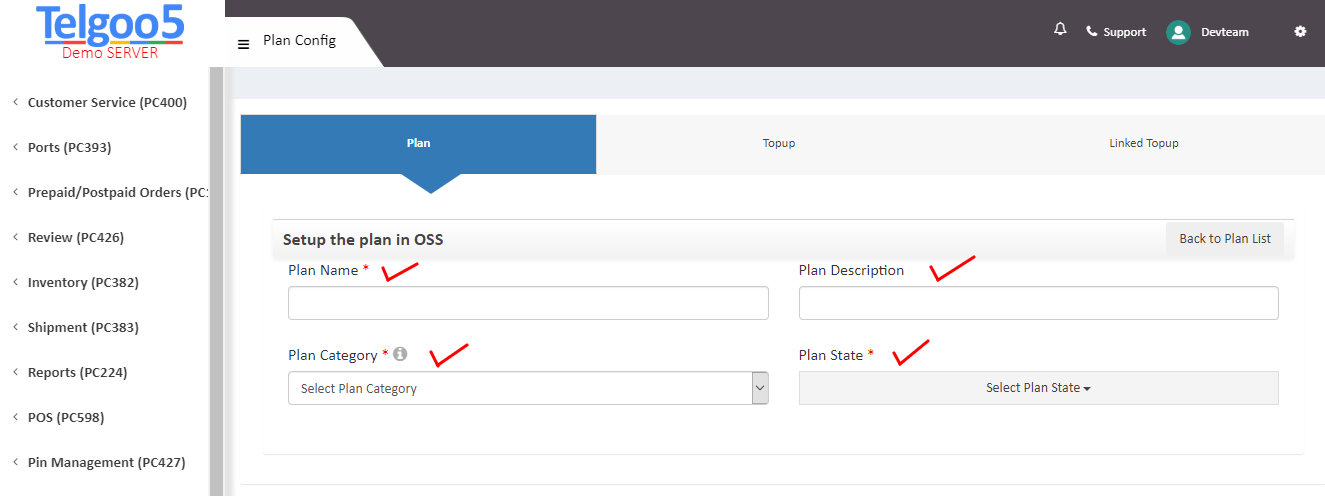
Step 4. : Enter the Plan Name, Plan Description, Plan Category and Plan State on this page.
What are Plan Name, Plan Description, Plan Category and Plan State?
- Plan Name: Plan name is the standard name of the plan which will be visible to the customers at the time of plan purchase. For e.g.: Standard 5GB LTE
- Plan Description: Plan description is the complete description about the plan. For e.g.: 5GB data with unlimited voice and text.
- Plan Category: There are two Plan categories that can be chosen. 1. Lifeline and 2. Prepaid/Postpaid.
Lifeline: Lifeline category is chosen for lifeline plans. Lifeline is a free government assisted program.
Prepaid/Postpaid: Prepaid/Postpaid is chosen in case of non-lifeline plans.
- Plan State: Plan state defines the states on which this plan will be activated/applied.
Step 5. : After entering the Plan Name, Plan Description, Plan Category and Plan State, we assign the carrier to the plan.

Step 6. : To assign the carrier, click on [Choose Carrier] button. It will open up the carrier selection dialog box. Choose the carrier from the dropdown box. For e.g.: Sprint Vcare.
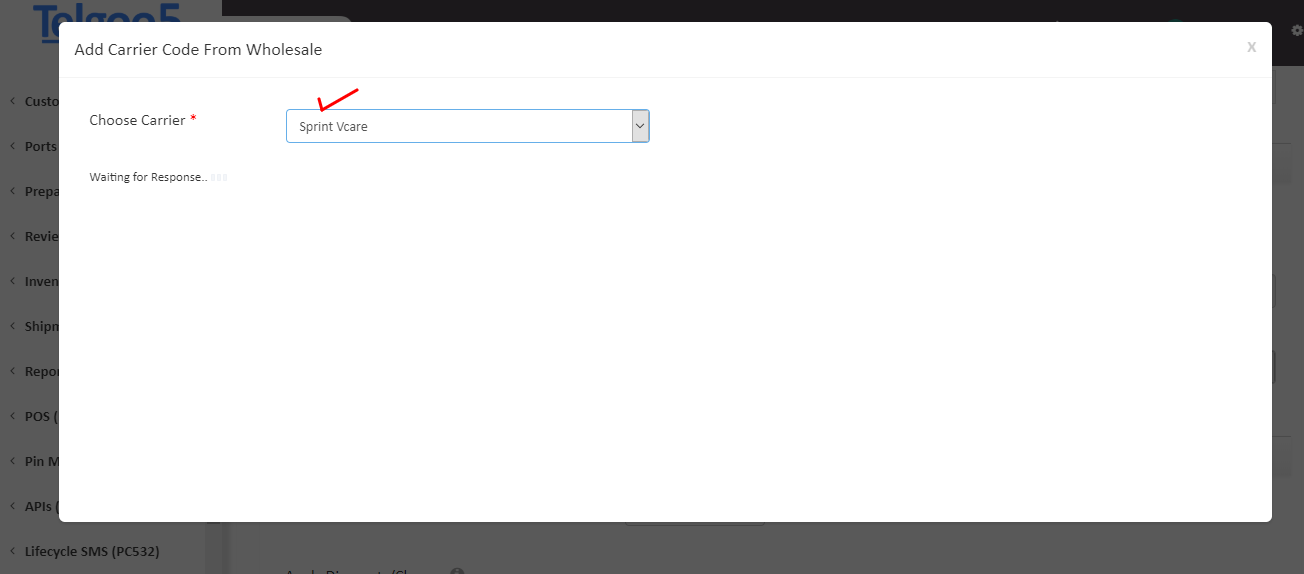
Step 7. : After selecting the carrier, click on [Add New Carrier Code] button.

Step 8. : Add New Carrier Code dialog will pop up. Enter the Tariff name, Plan Code, Validity, Balance, Bucket Information, Activation Rule, Rollover, data throttle and Features information to process the carrier code.
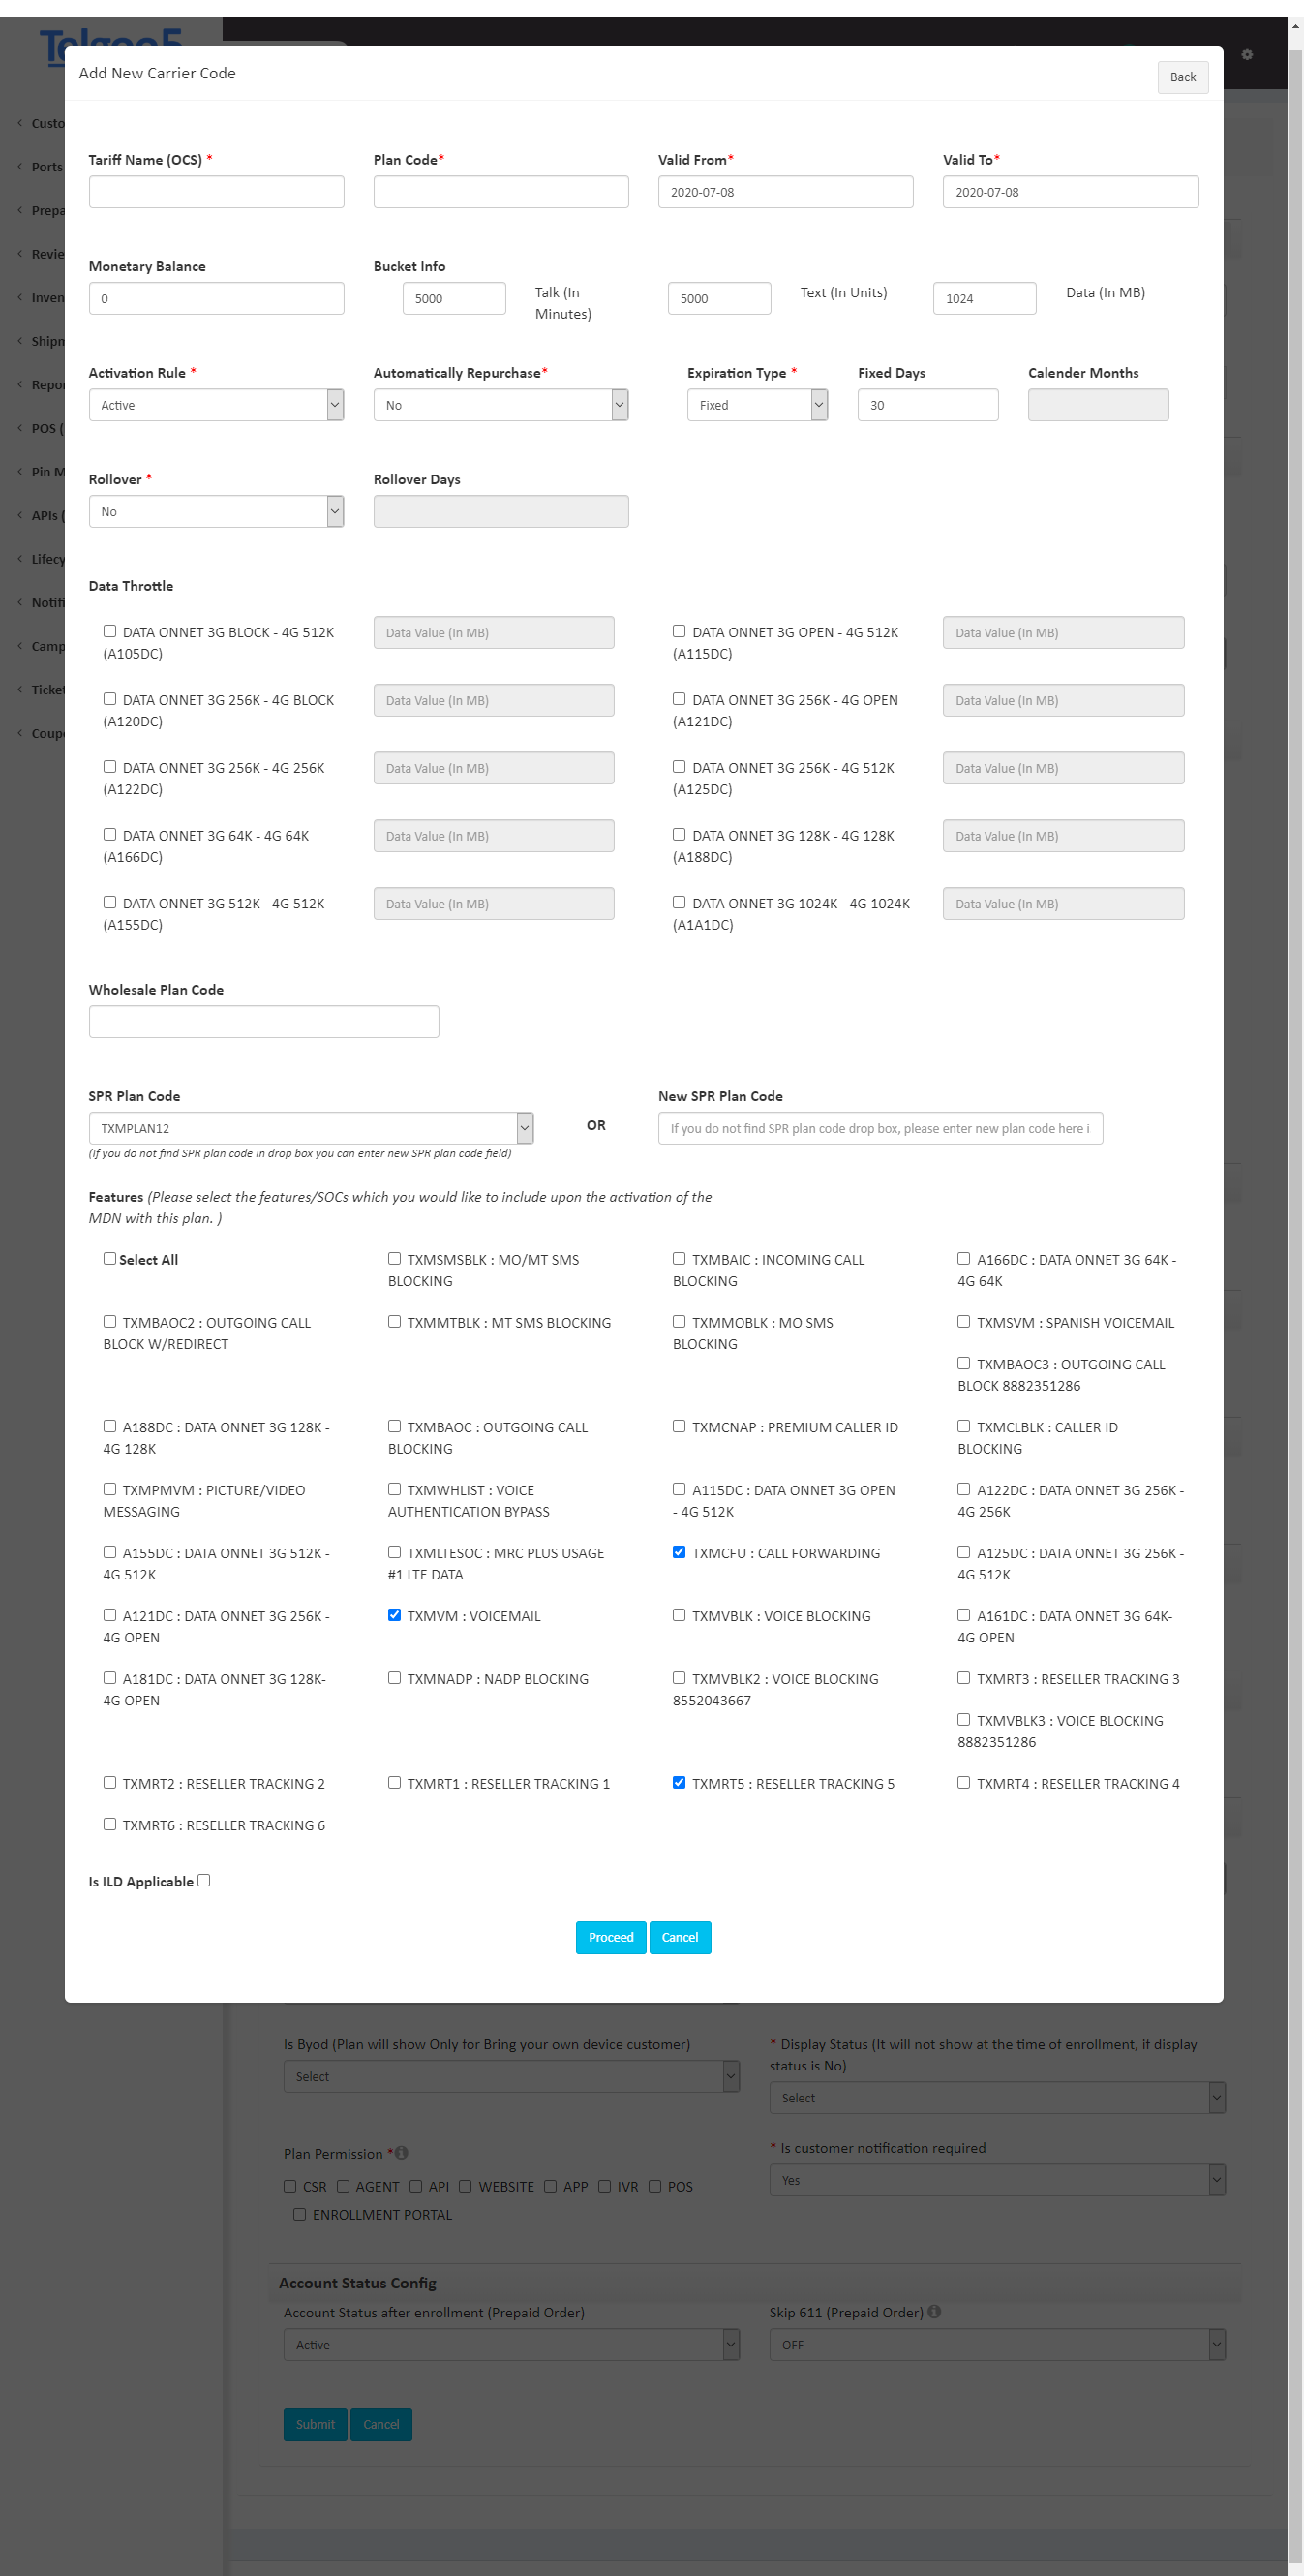
What are Tariff name, Plan Code, Validity, Monetary Balance, Bucket Information, Activation Rule, Rollover, data throttle and Features?
- Tariff name: Tariff name is the carrier code name which would help in recognizing that carrier code. For e.g.: 5GBLTE
- Plan Code: Plan is the numeric number which will reflect in the sprint wholesale against the carrier code.
- Validity: Duration until which the plan will remain active
- Monetary Balance: Balance to be added in the customer’s wallet
- Bucket Information: Text, Voice and Data quota are defined under bucket Information
- Activation Rule: There are 2 types of activation rules, Hotline/Active. Which means whether the subscriber needs to dial 611(hotline) to activate their plan or it will be automatically activated during the time of account activation
- Rollover: It means if the leftover plan benefits can be continued in the next month.
- Data throttle: It is the intentional slowing of an internet service. It is a reactive measure employed in communication networks to regulate network traffic.
- Features: Wifi calling, Caller ID, Video calling etc are some of the types of features that can be added.
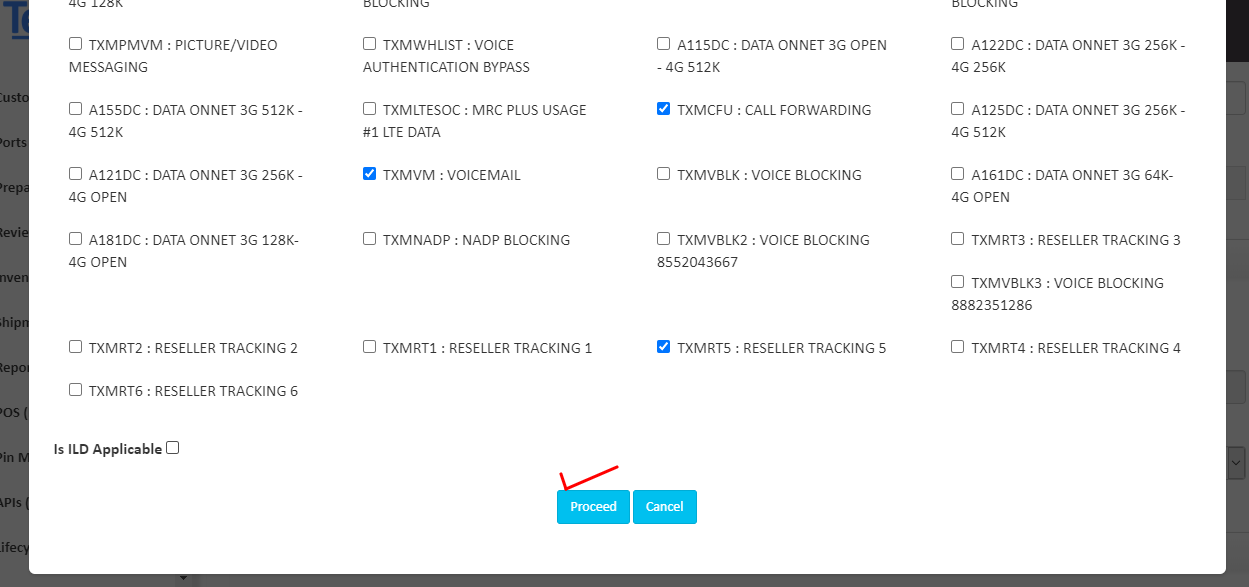
Step 9. : After adding all the relevant information on step 8, click on [Proceed] button at the bottom.
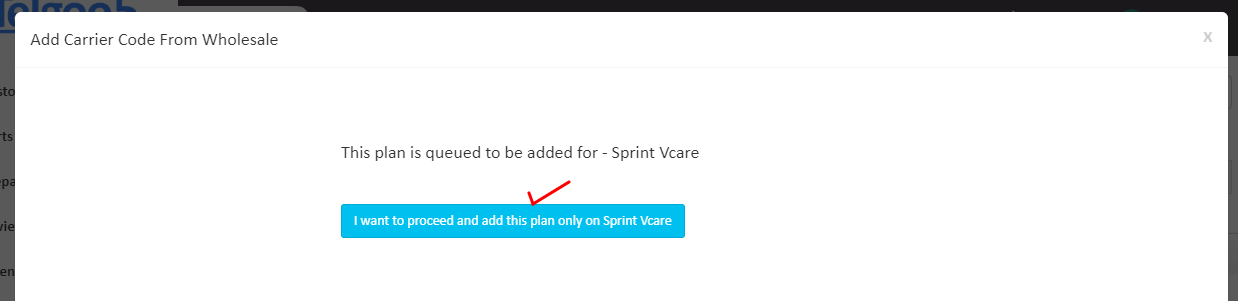
Step 10. : Upon clicking the proceed button on step 9, it will show: This plan is queued to be added for – {Carrier_name}. Click on [I want to proceed and add this plan only on {Carrier_name}].
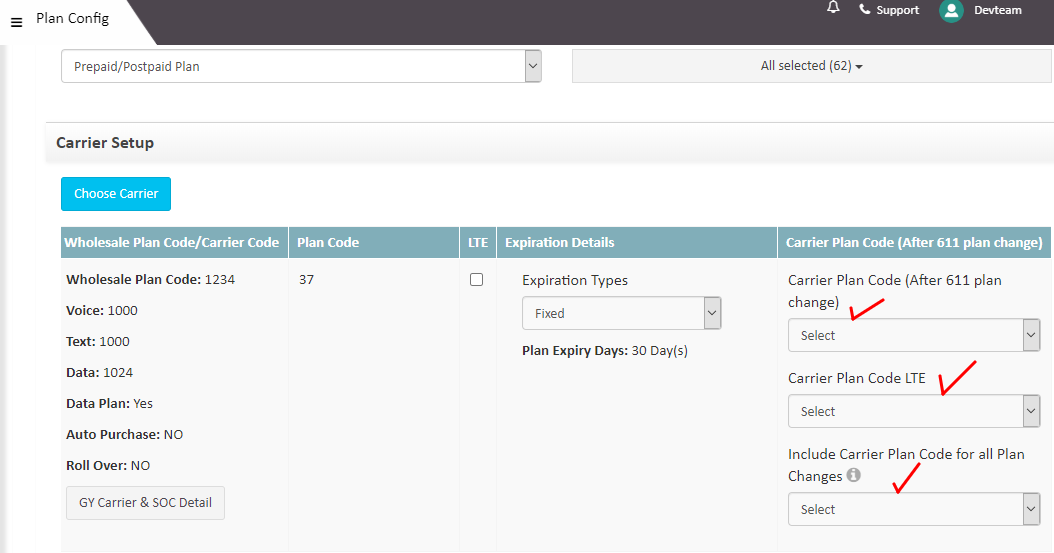
Step 11. : We’ll see the carrier setup screen as shown below. Enter the Change Plan Code (After 611 plan change), Carrier Plan Code LTE and Include Carrier Plan Code for all Plan Changes options for the drop down boxes.
Step 12. : Provide Grace Period Days and information about the account status after plan/grace expiry:
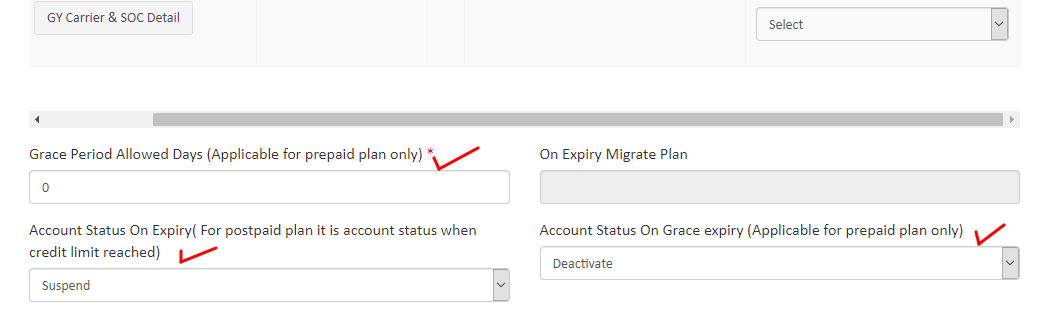
What is a grace period?
- Grace Period: It is a set length of time after the due date during which payment may be made without penalty. Subscriber’s account can be suspended/inactivated after the grace period is expired.
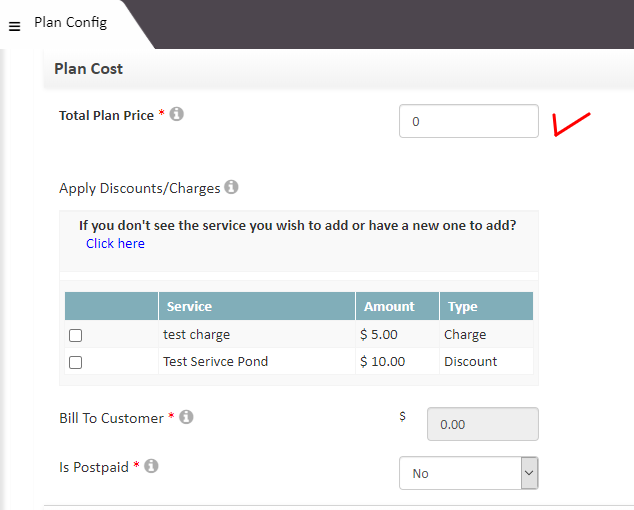
Step 13. : Setup the plan cost. “Bill to Customer” is the final amount charged from the subscriber on a particular plan.
Step 14. : Manage multiple Configuration during plan creation such as Family Plan, Prorated, Tax, Unlimited Plan, Autopay Discount etc.

How does Family Plan config, Prorated config, Tax config and Unlimited config, Autopay Discount Config works?
- Family Plan config: To setup a Family Plan, Turn this configuration to Y.
- Prorated config: When a customer subscribe to, or change plan that includes a bucket of data each month (for example, 1 GB, 10 GB, or 15 GB), those gigabytes of data will be prorated.
- Tax config: To manage the taxes to be charges or not at the time of plan purchase
- Unlimited config: This configuration is used to show the data, text or voices quota as “unlimited” on website.
- Autopay Discount Config: This is used to give discounts to those customers who have opted for autopay.
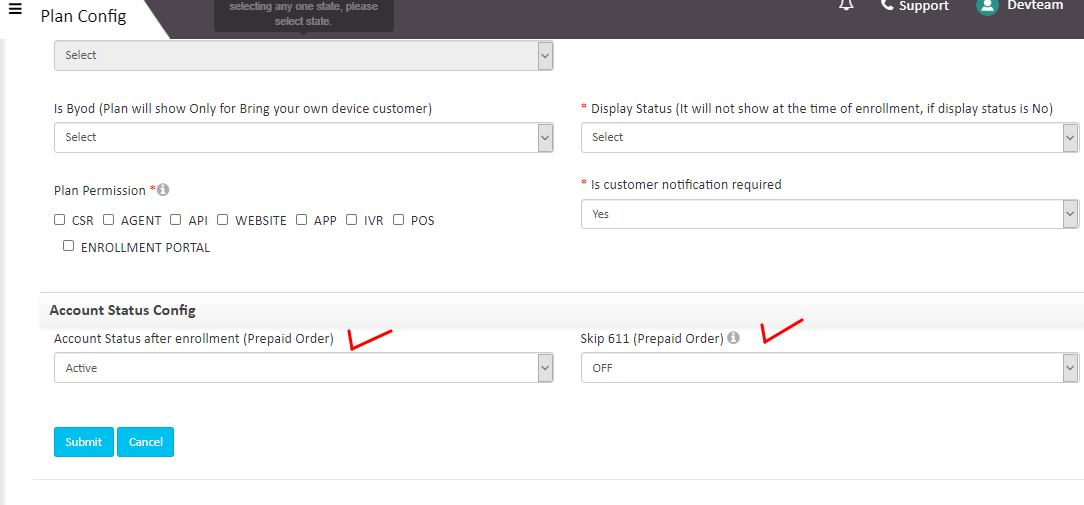
Step 15. : Manage Other settings such as Activation Fee, Offer Type, Display Status, Plan Permission, Is customer notification required, Plan Permission etc.
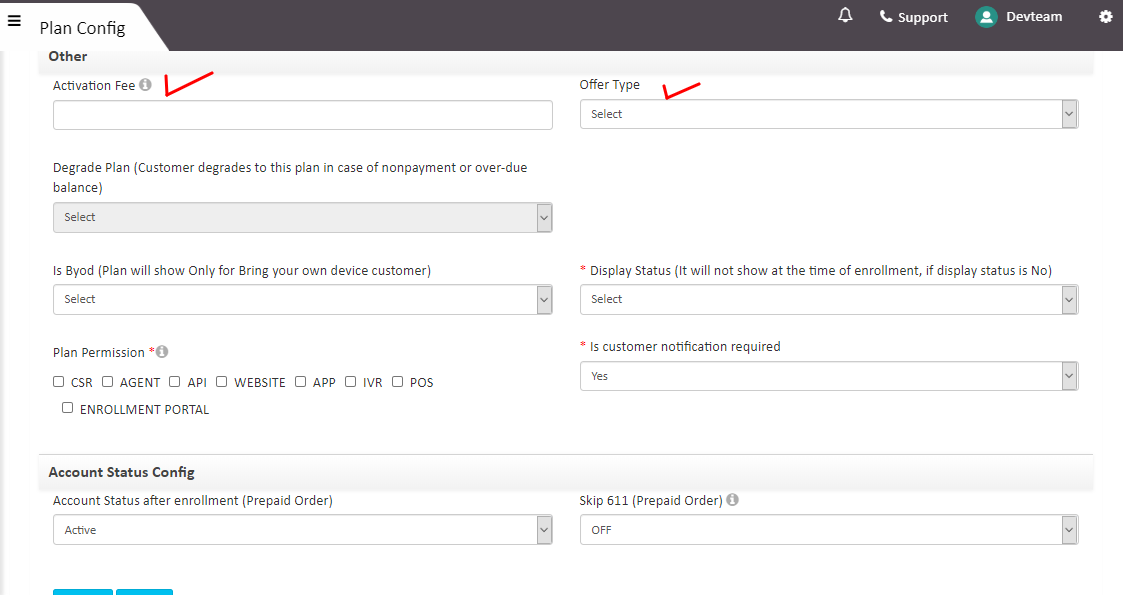
What are Activation Fee, Offer Type, Display Status, Plan Permission, Is customer notification required?
- Activation Fee: Activation is the onetime fee which can be charged from subscribers at the time of plan activation.
- Offer Type: It is used to show “Special Offer” tag on the website.
- Display Status: To show/Hide the plan at the time of enrollment.
- Plan Permission: It states the platforms where the plan will be visible like on POS, Website etc.
- Is customer notification required: This is used to send the plan activation email notification to the subscribers.
Step 16. : Set the Account Status after Enrollment and 611 settings and hit the [Submit]. Your plan will be created and ready for activation.