New Enrollment
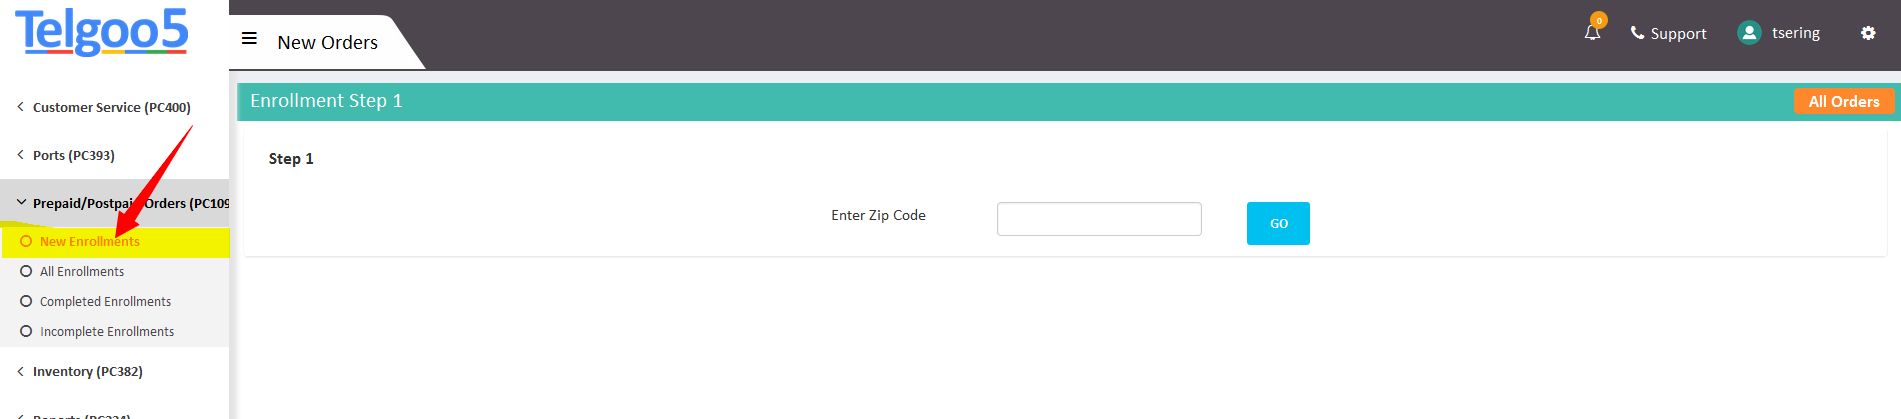
Under Prepaid/Postpaid Order tab and click on New enrollment to create Prepaid/Postpaid order.
Enrollment step -1
The enrollment procedure starts with entering a serviceable zip code.
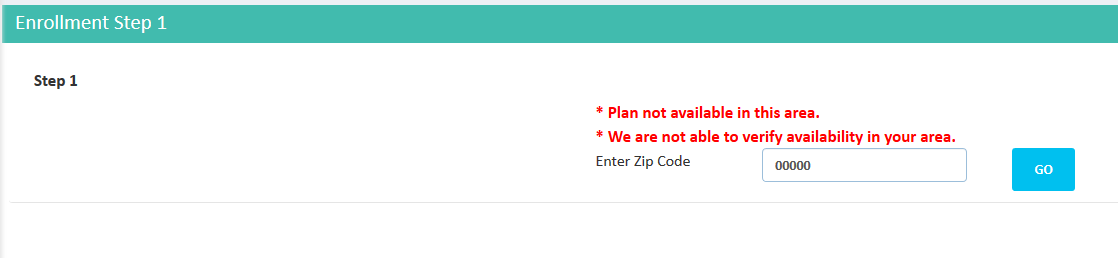
If the zip code that we enter is invalid or non-serviceable zip code then system then will return below mentioned error “*Plan not available in this area”. System will not allow user to proceed to next step of enrollment until user enter the correct serviceable zip code.
Enrollment Step 2:
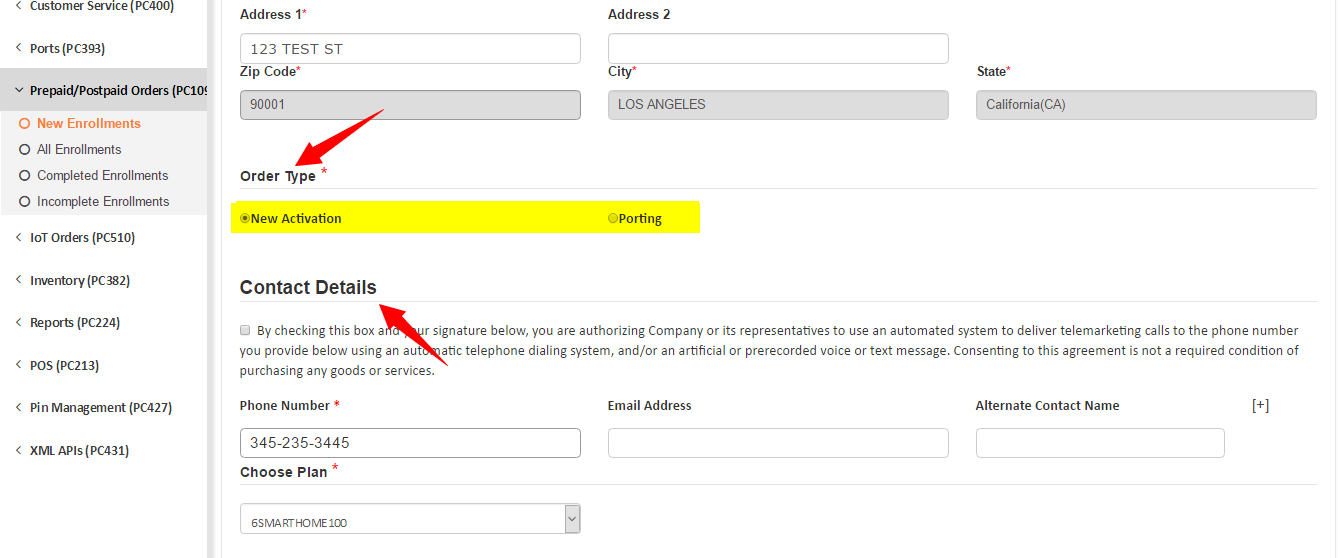
Once the zip code is entered, the system will generate an Enrollment ID on the top. Now, the employee needs to enter the Personal Information of a Prepaid/Postpaid Customer. Personal details would include First Name, Middle Initials and Last Name. Then, employee needs to enter the Applicant Address/Billing Address/Service Address where the City and State Name will be auto populated based on zip coded entered during first steps enrollment. System will not allow agent to edit city, state and zip code. We need to choose order type, contact details and Choose plan on which customer wants to activate the service.
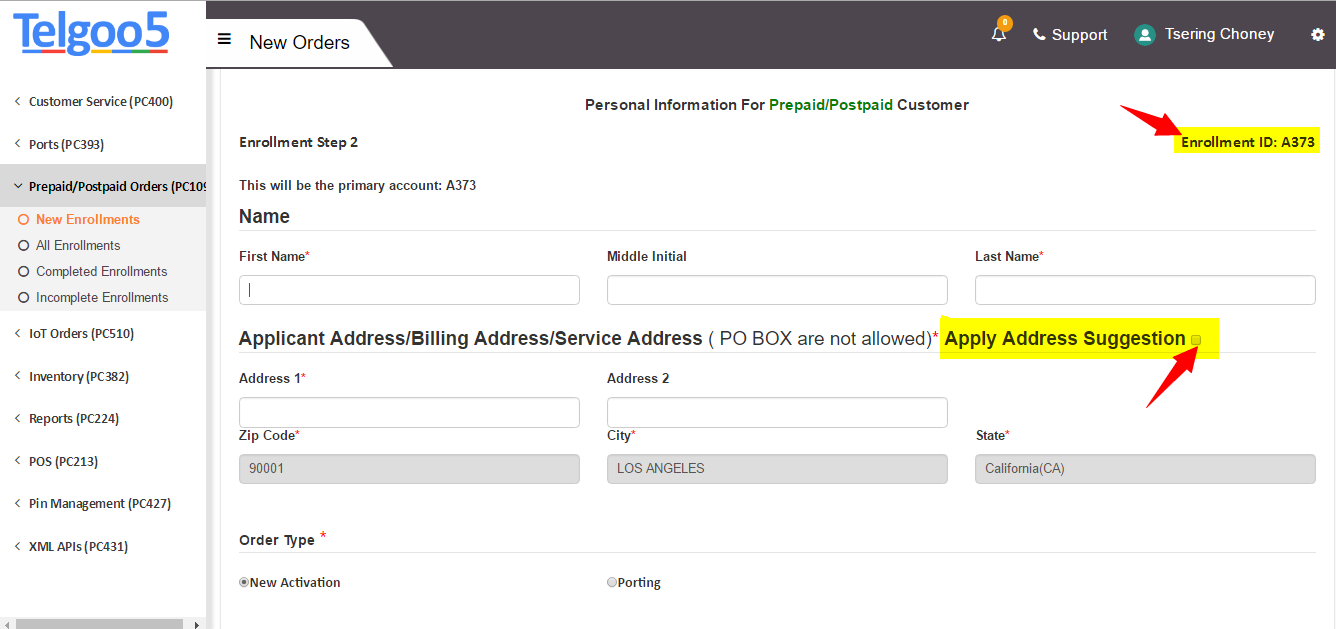
Apply Address Suggestion Check box
If you turn on address suggestion by checking apply address suggestion check box then all service addresses will be validated against MELISSA database. Once we start typing in address field, based on the input character typed, Melissa will return address suggestion drop list and agent will have to select the address from the Melissa suggested address. The system will not allow any invalid address to go through when address suggestion check box is checked.

If you choose to leave address suggestion check box unchecked then system will skip address validation via Melissa and the address typed in address field 1 and 2 will be captured as customer address.
Order type:
Default selection for order type will be New activation, if customer wants to portin the number then we need to check portin check box.
New activation: customer telephone number will be generated based on the service address zip code incase of non provisioned ESN/SIM. Telephone number/MDN assigned with provisioned ESN/SIM will be attached to the customer.
Porting : if customer wants to portin his/her existing number with other service provider and Portin number us active with other service provider. When we choose order type as porting system will expand the enrollment form where we will need to fill the number portin form to place request will be send to other service provider to release the telephone number. Below is the screenshot where you will need to fill the portin information.
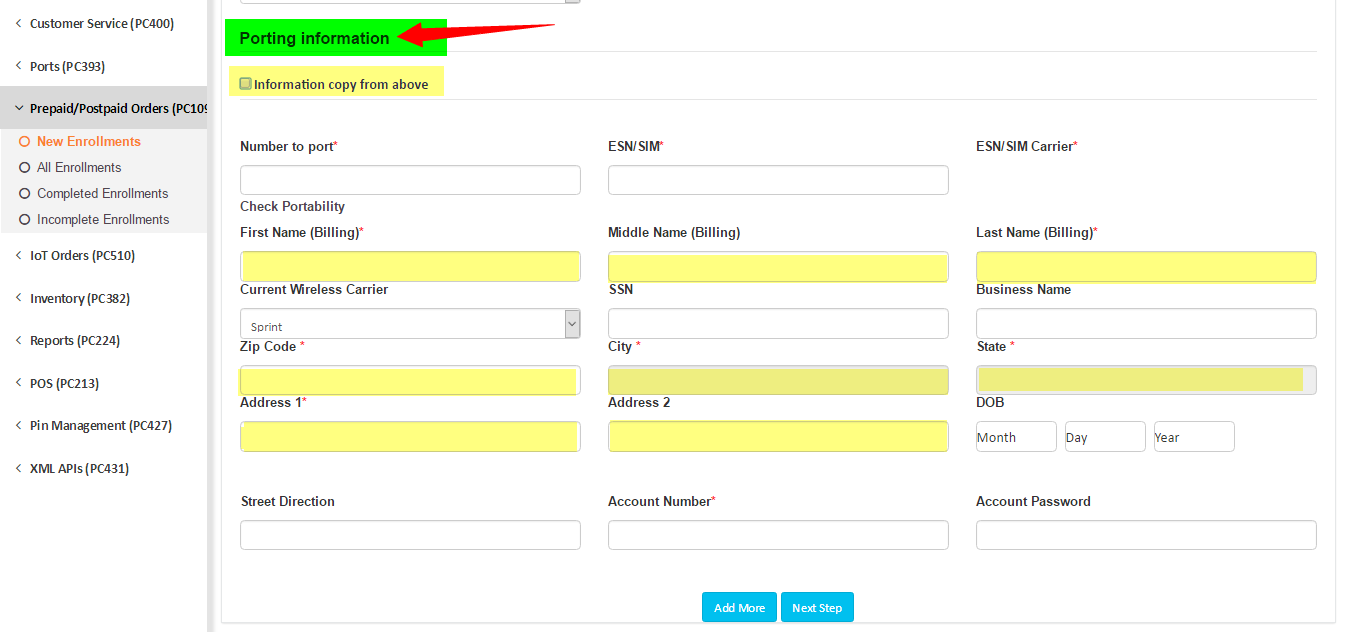
If we check the information copy from above check box then system will copy customer name and address from the applicant information. We can also edit these information.
Number to Port: telephone number which customer wish to port in.
ESN/SIM: we need to enter a Free non provisioned assigned ESN/SIM loaded in inventory in this filed.
ESN/SIM carrier: Based on the ESN/SIM information enter in the ESN/SIM field system will automatically populate the carrier. ESN/SIM should be available in inventory as Free Assigned non provisioned ESN/SIM.
If ESN/SIM is not found or the ESN/SIM status is not free in inventory we will get below mentioned error stating ESN not found free in inventory
Name and address : Name and address associated with portin telephone with other service provider.
DOB: Date of birth with portin telephone with other service provider
SSN: Social Security number. It’s a non-mandatory field and hence its optional.
Current wireless carrier: portin telephone number current carrier. We need to select from the drop down list.
Account Number and Password: Account number and password with other service provider. Customer can call his portin telephone number carrier and they will provide these information.
Check Portability: click on check portability to check whether the telephone number which customer want to portin is eligible for number port in or not.
Contact Details
We can collect customer contact details such as phone number, email and alternate contact name. Phone number is a mandatory filed. We can add more field by clicking on as highlighted in below screenshot.
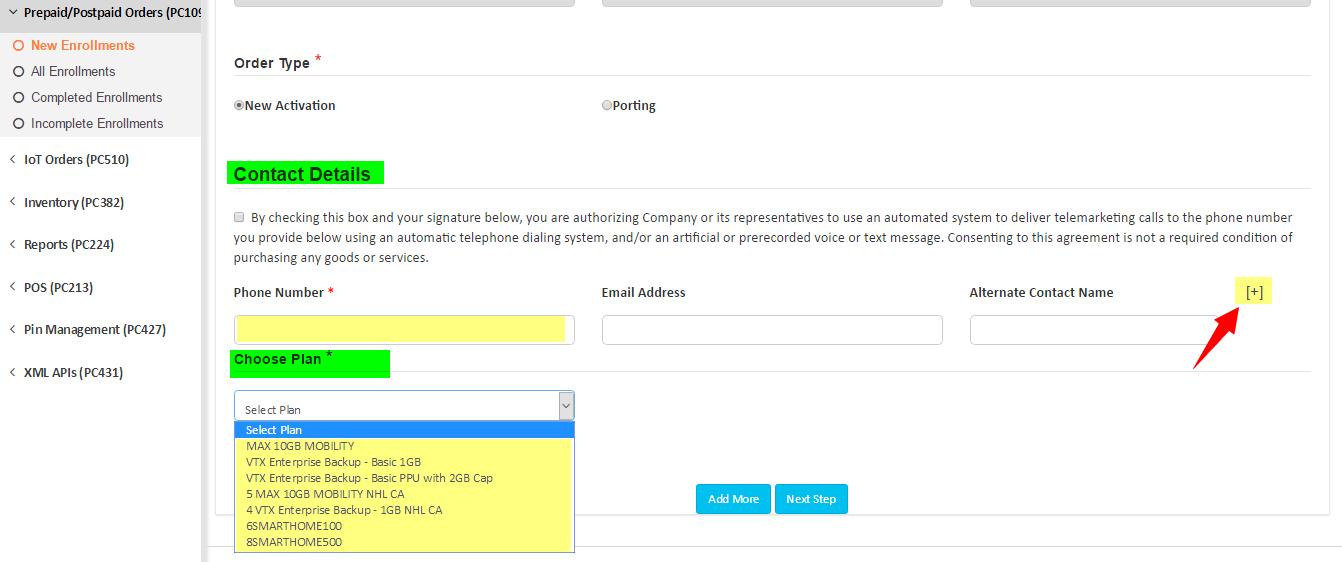
Choose Plan
Active service plan available for this state will appear in plan drop down list and agent needs to choose the plan. Telephone number will be activated with the selected plan.
Click on the next step to proceed with the handover option.
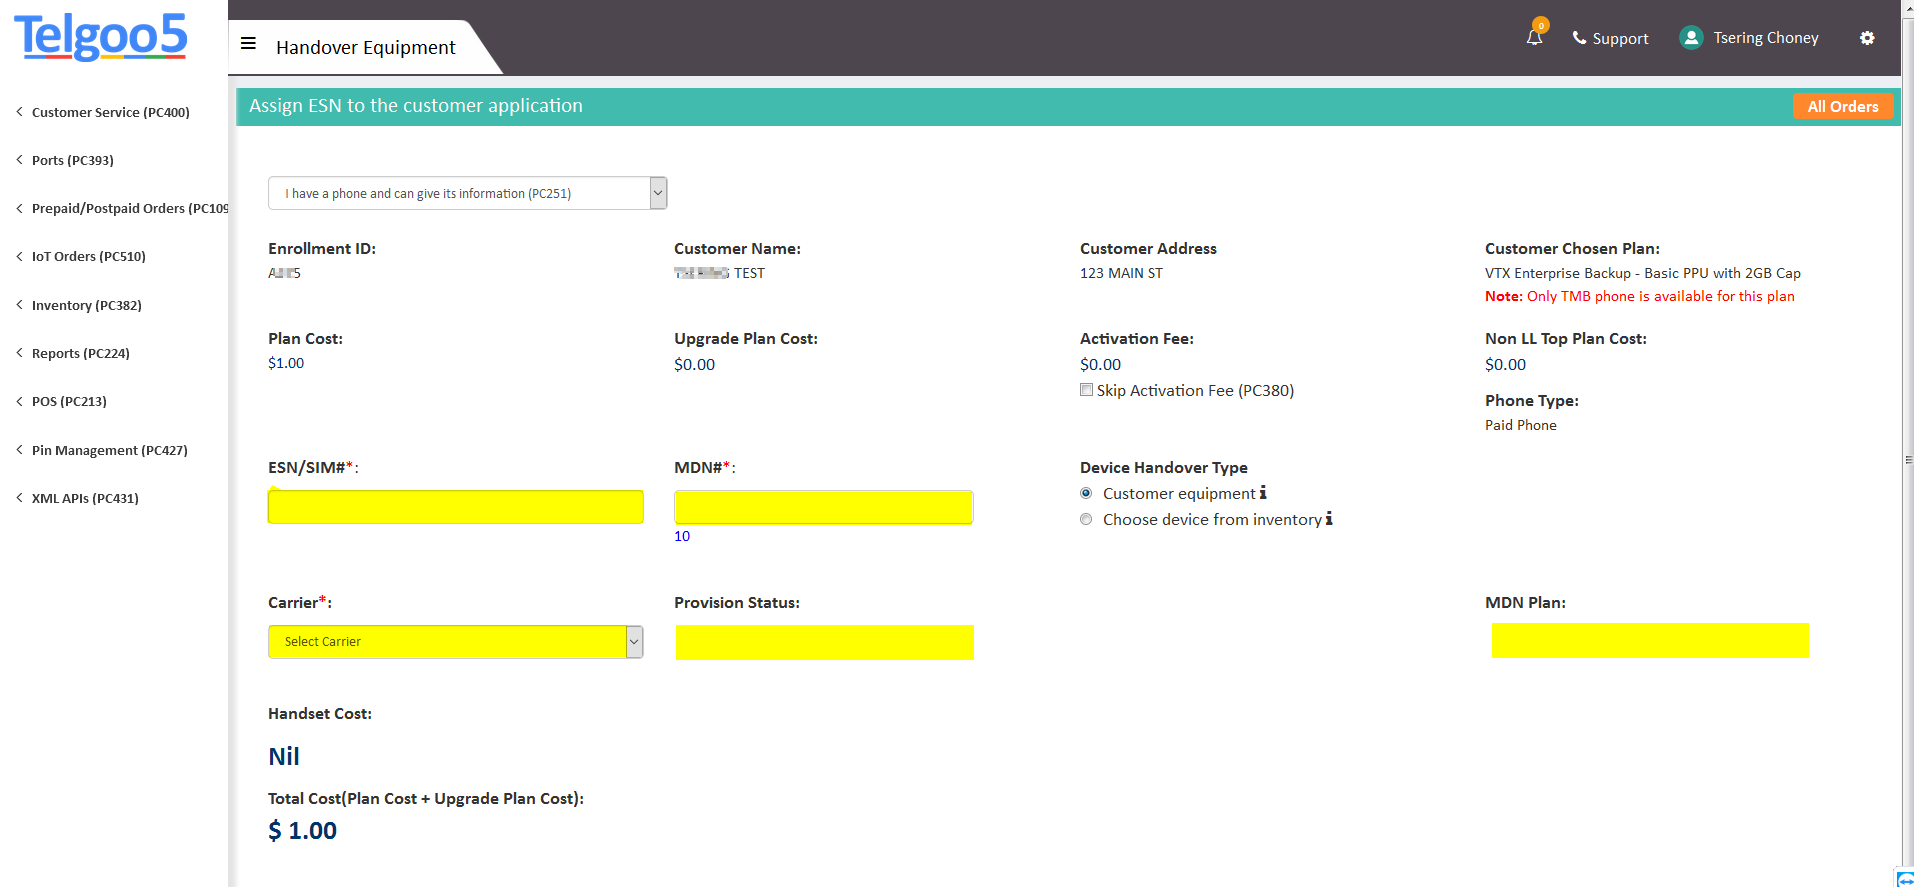
Handover
Under this page we assign ESN to customer application where system will give the following options:
- I have a phone and can give its information
- I do not have a pre-activated device (Shipment)
- Customer wants to bring his own equipment
I have a phone and can give its information
Below mentioned screenshot shows the handover option 1. i.e., I have a phone and can give its information. Under this page you can see customer information. Agent needs to enter the ESN/SIM number and the system will populate the ESN/SIM provisioned status based on whether the ESN/SIM is a provisioned phone or non-provisioned phone and the carrier will be auto populated.
In case of provisioned ESN/SIM system will display the current plan of that ESN/SIM under MDN plan.
Activation fees and Handset cost are decided at the time when inventory is uploaded in the telgoo5 system.
- If the ESN/SIM that we enter is already in used then system will return error message “ESN/SIM already used with another account in Vcare (Customer ID: )”
- If the ESN/SIM is loaded in inventory but not assigned to any employee chain then we will get below mentioned error “Box is not created for this ESN”
- If the ESN/SIM that we enter is not in inventory then system will return below mentioned error “ESN not found in inventory. The system can’t proceed it.”
- If the ESN/SIM that we enter is a free assigned ESN/SIM which is available to use then system will give option to proceed to payment page.
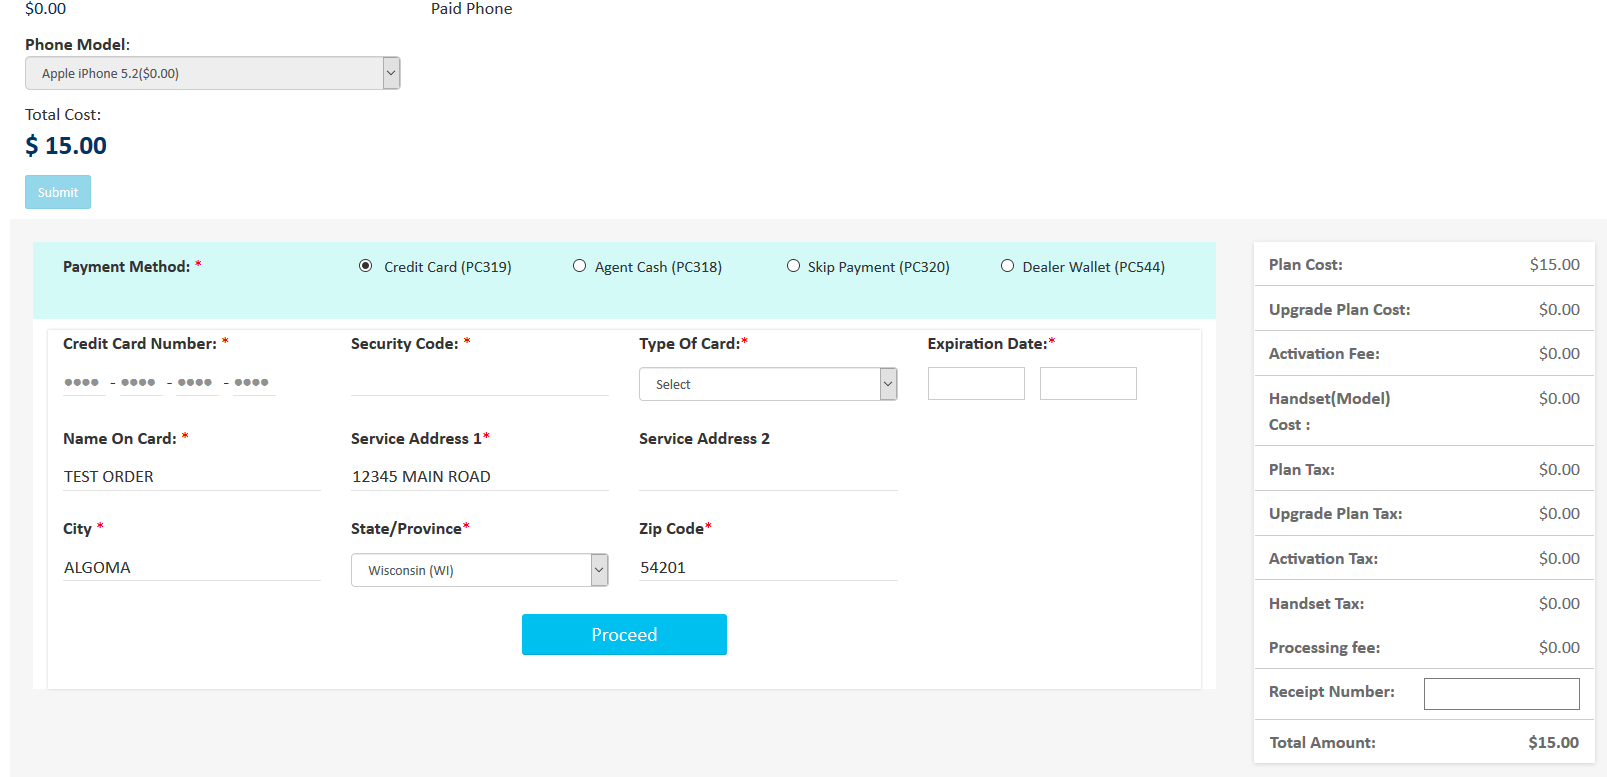
Click on Proceed after providing the ESN/SIM to make the payment and we can take payment via credit/debit card, cash or we have option to skip the payment and these options are permission driven. If we remove permission for skip payment then skip payment option will not display. See below screenshot.
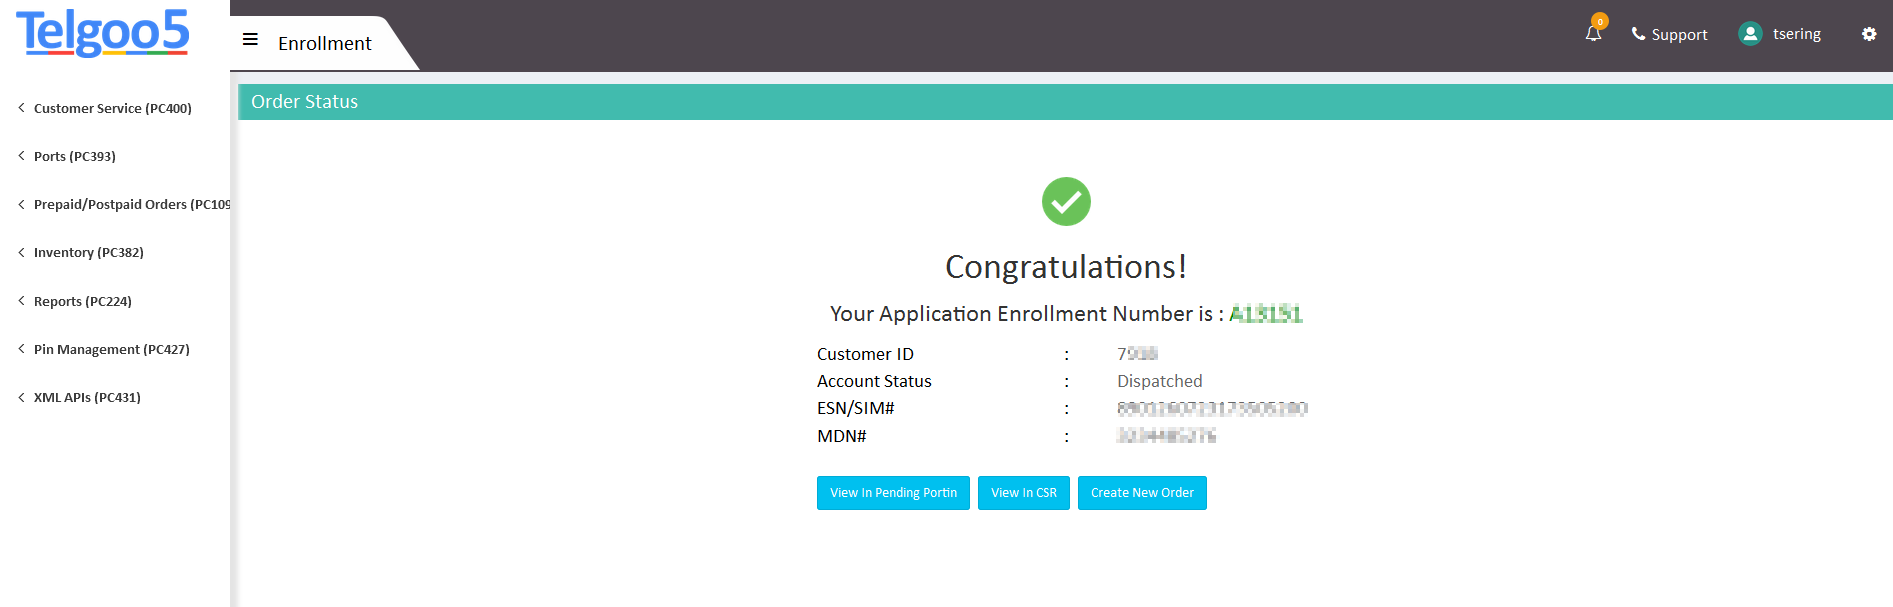
We will get below mentioned screen with applicant enrollment ID, ESN/SIM# and MDN.Click on View in CSR to pull up customer account.
In case of portin order click on view in pending portin where system will redirect you to pending port list.
I do not have a pre-activated device (Shipment)
This option will allow the employee to have the shipment team assign the phone device details on the account. The shipment team will then ship the phone to the customer.
Customer wants to bring his own equipment
This option is applicable if customer is bring his/her own device/equipment and it’s option is applicable for Verizon or sprint CDMA phone. Incase of 4G phone we need to enter UICCID as well.
All Enrollments
Under All Enrollments tab, you can view each and every enrollment (complete or incomplete), with equipment handover status where you can handover equipment if the handover process is not completed.
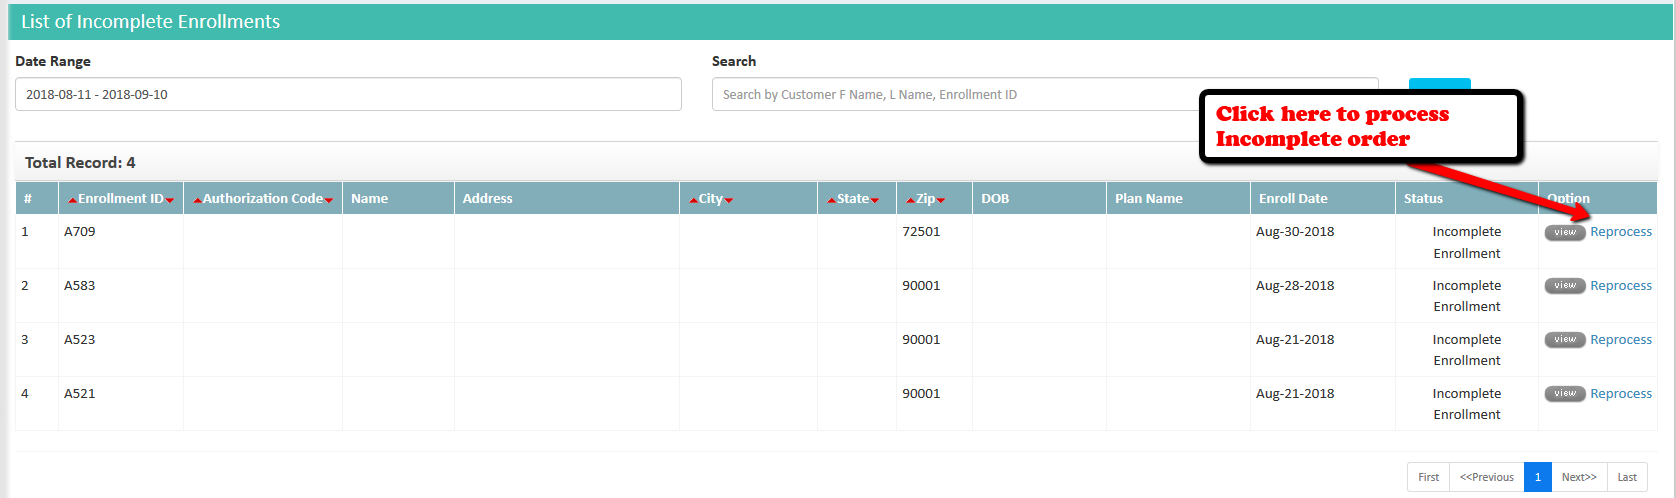
Incomplete Enrollments
The search text box on the top would allow an employee to search enrollment either via Customer’s First Name, Last Name or through their Enrollment ID.
The system also allows the completed enrollments to be filtered by dates. You can enter a start and an end date to find a specific application. A combination of both can also be used.
We can reprocess any incomplete enrollment by clicking on Reprocess under this option..